Electric Roadsign:
This is a model of an electric roadsign of the type you may see near construction sites or traffic incidents. I had several goals for this model:
- It must be realistic
- While preparing to execute this model, I photographed and made videos of one of these signs near my house for reference. I also made a huge number of measurements, covering every part of the structure.
I also took photos that would be used directly in texturing the model.
- It must be modular
- Although this model was made simply as practice, the intention was that it could be used in a source engine map. Because I didn't know beforehand the exact context of its use, I wanted to create
a model that could be used in a variety of situations. Therefore, the model can display any text on its face, including changing text, and the structure of the model is split into three parts.
This allows the signboard to be raised up or down, or rotated, just as the real-life sign can. Also, the pieces can be used individually i.e. if the sign is flipped over, broken, etc.
- It must be performant
- Optimising the mesh and texture use was important. The base model parts use texture as much as possible to bring out small details. The letters and symbols that can be displayed on the signboard
all share a single texture.
|

|
Reference
- Images of the Electric Roadsign were taken to provide reference.
- You can see a narrated reference video here.
- I made extensive measurements of each part of the Electric Roadsign, which were used to create a very realistic and accurate model.
|

|
Modeling
- The model was made in four sections. This allows the sign to be re-oriented, or for each section to be used in a level individually as broken parts.
- The four parts are the trailer base, riser pole, signboard, and a model used for each of the 24 letter spaces, seen exploded in the editor here.
- The model was created with bevelled edges to catch lightning highlights, which was inspired by the talk "The Ultimate Trim: Texturing Techniques of Sunset Overdrive" by Morten Olsen at GDC 2015.
|

|
Unwrapping and Packing
- I marked seams, unwrapped, and packed each model to create UV maps for each section of the model.
|

|
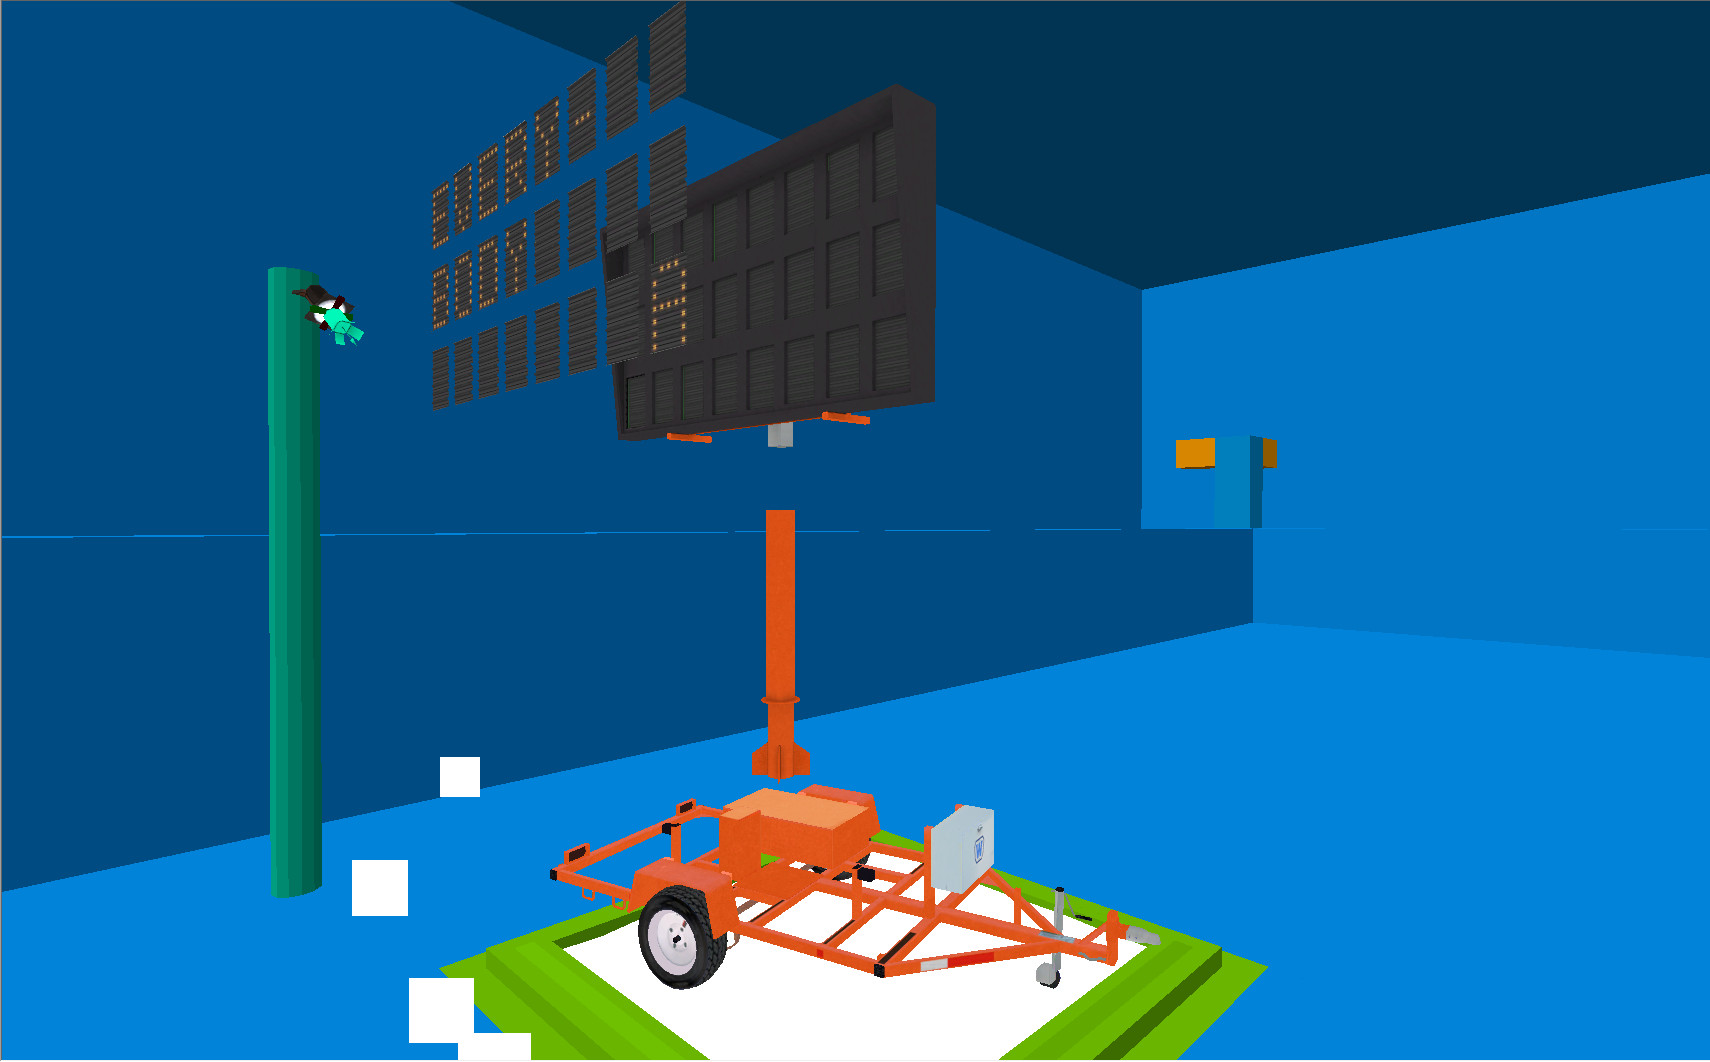
Base Textures
- The base texture for each section of the model was assembled from photo reference, and composited in GIMP.
- Using Blender's built-in rendering, I created an ambient occlusion term (example here) which was baked in to each texture.
|

|
Advanced Material Effects
- Several features of the Source engine's advanced material system were used to enhance the model.
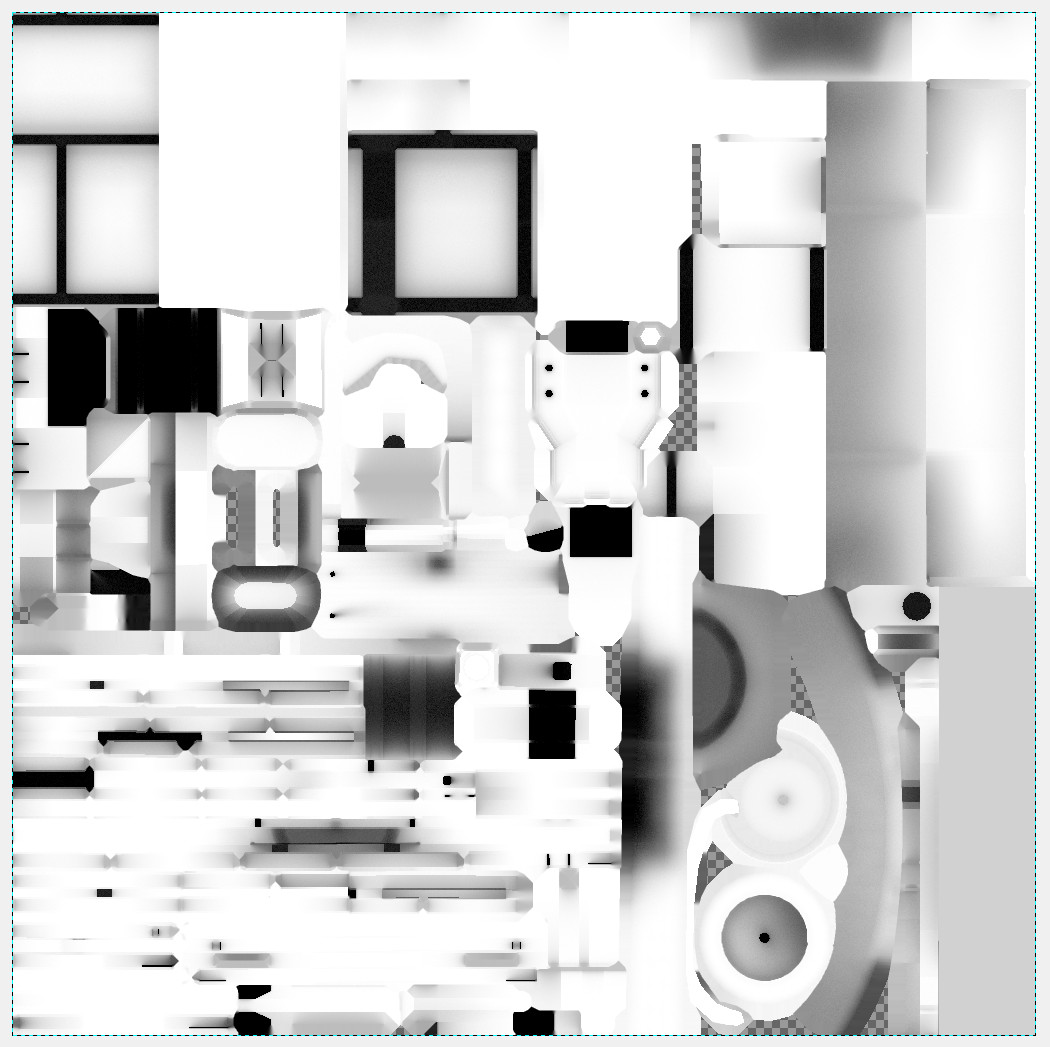
- Each material has a normal map, which defines how the material interacts with ambient lighting, as well as lighting from the player's flashlight, and phong shading.
- The alpha channel of each normal map is used as a 'phong mask' (example here), which defines the intensity of the phong highlight on a per-texel basis. Basically, this makes certain areas of the model (such as the reflective tape strips) more reflective than others.
- The glowing letters were created by using the base material's alpha channel to define self-illumination (i.e. minimum brightness), pictured at left).
|

|
Export Pipeline
- A model such as this one assembles many components to be used as one entity in the Source engine, which are the base model, a collision hull, the base material and any other materials
used (normal maps, etc.), a material definition script (.vmt) file, and a default animation (which on an un-animated model such as this one is just boilerplate).
- The letters for the signboard all share the same base texture. For each letter, there is a material that defines a base texture, and an offset move the texture into a position that show shows the letter.
This is the material definition for the letter y. Atlasing the textures together in this way spares the overhead of loading 40-some individual small textures.
- The letter model is given many 'skins', each of which is a different material, each corresponding to each letter/number/symbol that the letter model can display. In the editor or the engine, the skin of the model can be switched to pick which letter to display.
- The collision hull is a collection of convex shapes. The computational cost of these adds up quickly in the engine's physics simulation, so the collision hull is a very simplified version of the full model. See the collision hull in yellow wireframe at left.
|

|
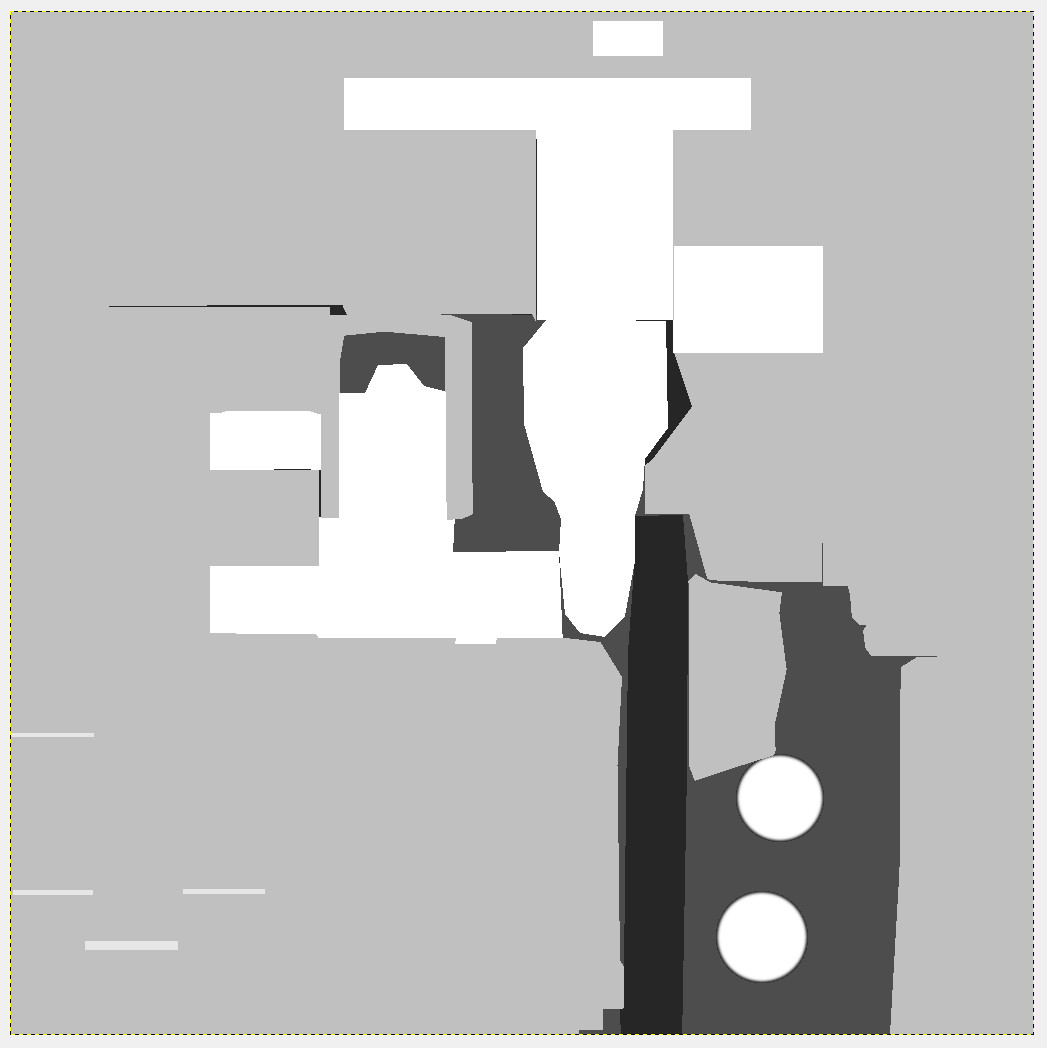
In-Game Logic
- Logic entities in the editor can be used to switch the skin of the letter models according to a timer. This causes the readout of the sign to change periodically.
- In this case, the sign cycles through four different readouts, resulting in a full message.
- Light glow entities were also switched on and off to simulate each letter glowing if it was displaying anything but a blank space.
|

|
Putting It Together
|
|


